Understanding Sash Cords and Common Causes of Breakage
What are sash cords and how do they work?
Sash cords are essential components within traditional double and single-hung sash windows, serving the critical function of balancing the weight of the window sashes to allow smooth opening and closing. Typically composed of durable materials such as cotton, hemp, nylon, or synthetic fibers, these cords are wound around a pulley and attached to weights—often called counterweights—that counteract the sash’s weight. When you lift or lower the sash, the sash cord and its associated hardware work in harmony to facilitate effortless movement, ensuring the window operates seamlessly and remains securely in place once lifted or lowered.
In modern terms, sash cords act as the structural ‘skeleton’ of the window’s operation mechanism. They are positioned within the window frame, running over pulleys housed in the sash, connecting the sash to the weights enclosed in the cavity behind the window frame. This balanced setup maintains consistent tension, which is critical for the window’s stability and ease of use.
Typical reasons sash cords break or wear out
Sash cords are subjected to constant mechanical stress, environmental exposure, and material degradation over time. The most common causes of breakage include:
- Age and Material Fatigue: Over years of use, the natural fibers or synthetic materials of the cord weaken due to stretching, fraying, and exposure to environmental elements, leading to eventual snapping or failure.
- Environmental Factors: Moisture, humidity, and temperature fluctuations can accelerate deterioration. Wood rot, mold, and mildew can also compromise the integrity of the cord or nearby components.
- Corrosion of Hardware: Metal pulleys or weights may corrode or seize, placing additional strain on the cords and increasing the risk of failure.
- Improper Maintenance or Handling: Rough operation, excessive force during use, or neglecting inspections can cause undue stress on the cords, hastening their deterioration.
- Frequent Use and Wear and Tear: Windows in high-traffic areas or frequently opened and closed may see faster wear, especially if the cords are not regularly serviced or checked.
Understanding these causes allows homeowners and property managers to implement proactive measures to extend sash cord life and prevent unexpected failures.
Signs indicating the need for replacement
Recognizing early signs of sash cord deterioration can help prevent complete window failure and costly repairs. Key indicators include:
- Stuck or Difficult-to-Move Sashes: Difficulty raising or lowering the sash, or the sash hanging unevenly, can signal a broken or worn sash cord.
- Loss of Counterbalance: When the sash doesn’t stay in position or drops suddenly when raised, the cords may be frayed or snapped.
- Visible Damage: Fraying, loose strands, or signs of wear around pulley areas or within the window frame suggest imminent failure.
- Unusual Noises: Creaking, grinding, or slipping sounds during operation could indicate that the pulley or cord is damaged or misaligned.
- Broken or Disconnected Cords: If you can see the cord hanging loose or fully severed, immediate replacement is necessary to restore window function.
Timely identification of these signs can prevent larger issues, such as wood rot or structural damage, ensuring your windows remain functional and safe.
Step-by-Step Process for Replacing Broken Sash Cords
Preparing tools and materials for the replacement
Before beginning the replacement process, gather essential tools and materials to ensure a smooth operation:
- Sash cords: Choose high-quality, durable cords suitable for your window type and size.
- Measuring tape: To measure the length of the existing cord accurately.
- Scissors or utility knife: For cutting new cords and trimming excess.
- Screwdrivers and chisel: To remove beading, sash, or other hardware as needed.
- Drill and bits: For opening access plates or removing hardware.
- Hook or weight attachment tools: To connect cords to weights or pulleys securely.
- Protective gear: Gloves and safety glasses for safety during handling.
Having these items ready will streamline the replacement and minimize disruptions during the process.
Safely removing the sash and old cords
The process of removing sash cords begins with a cautious approach to prevent damage to the window frame or glass. The key steps include:
- Identify access points: Usually, this involves removing the window beading or stops. Carefully pry off the beading using a chisel or screwdriver, working gently to avoid damaging the wood or surrounding frames.
- Lower or tilt the sash: Depending on your window design, tilt the sash inward or fully remove it from the frame if necessary. Support the sash during removal to prevent accidental drops or damage.
- Locate the sash cord and pulley system: Access the inside of the window cavity, typically through a small hatch, screw access panels, or by carefully exposing the pulley mechanism.
- Disconnect the old cord: Unscrew or detach the cord from the pulley and the weight. If the cord is frayed or snapped, remove all remaining sections to prepare for the new cord installation.
- Inspect other components: Check pulleys, weights, and hardware for signs of corrosion or damage. Replace or repair these parts if needed for optimal operation.
This careful removal process minimizes the risk of damage, ensuring your window remains functional and ready for new parts.
Installing new sash cords and reassembling the window
The final phase involves threading the new cords, reinstalling hardware, and restoring the window to its operational state:
- Measure and cut the new cord: Measure the length of the old cord while the sash is in the desired position, adding a few inches for knotting or attachment. Cut the new cord to this length.
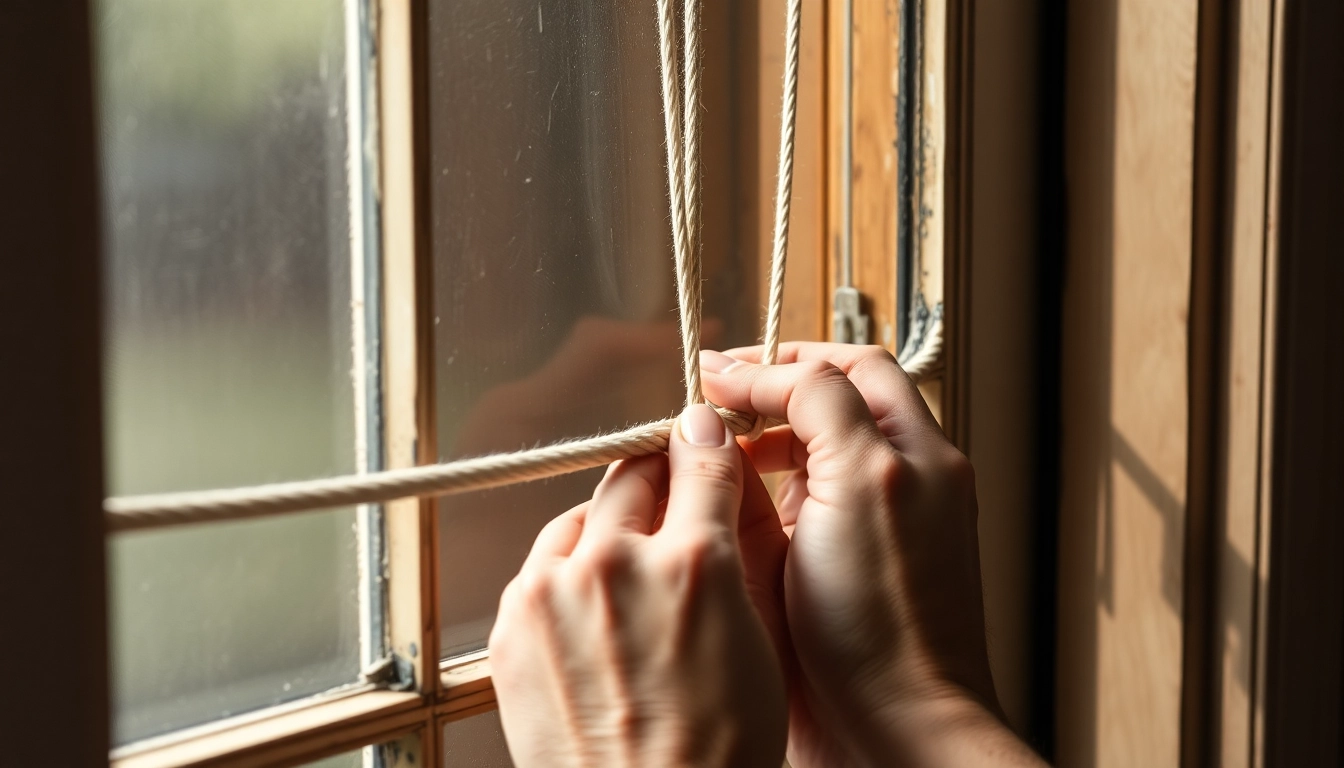
- Attach the cord to the sash: Securely tie the cord to the sash, ensuring knots are tight and durable. Premium knots like double fisherman or bowline are recommended for secure attachment.
- Thread through pulley system: Carefully pass the cord over the pulley, ensuring smooth movement. Attach the other end to the weight, which should be in good condition and properly attached.
- Reinstall the sash: Carefully reposition the sash within the frame and secure it with the beading or stops. Check the movement for smooth operation and proper counterbalance.
- Test the window: Gently open and close the sash, observing the movement and ensuring it stays in place at various levels.
- Final adjustments: If the sash doesn’t move smoothly or remains unbalanced, recheck the cord length and attachment points. Make fine adjustments as necessary for optimal performance.
Proper installation not only restores functionality but also prolongs the lifespan of your sash window components.
Cost Considerations and DIY vs. Professional Replacement
Average costs and factors influencing price
Replacing sash cords varies in cost depending on materials, window size, complexity, and labor. In the UK, approximate costs include:
- DIY replacement: Basic kits and cords can cost as little as £10 to £30 for materials such as high-quality cords, pulleys, and tools. This is suitable for those comfortable with basic DIY tasks.
- Professional service: Hiring a specialist can range from £70 to £150 or more, depending on the number of windows, accessibility, and additional repairs needed.
Additional factors influencing costs include the quality of replacement parts used, whether additional repairs are required (e.g., replacement of pulleys or sash wood), and location-specific labor charges.
When to attempt DIY repair
Considering DIY sash cord replacement is advisable if you:
- Have basic handyman skills: Confidence with tools like screwdrivers, drills, and understanding of window mechanisms.
- Follow detailed guides and tutorials: Resources such as YouTube videos or comprehensive how-to articles provide step-by-step instructions.
- Encounter accessible window setups: Windows with straightforward access points, evident hardware, and clear pathways are ideal.
However, avoid DIY if your window installation is complex, involves extensive damage, or if safety concerns arise during the process.
Benefits of hiring professional sash window repair services
Engaging experienced technicians offers advantages such as:
- Guaranteed quality work: Proper installation, minimizing future operational issues, and avoiding costly mistakes.
- Access to quality parts and tools: Professionals use durable, performance-optimized materials that last longer.
- Time and effort savings: Specialists can complete repairs efficiently, often within hours.
- Additional repairs and maintenance: Professionals can identify and fix related issues, such as wood rot or hardware deterioration, preventing recurring problems.
- Compliance and safety standards: Ensuring your windows meet safety and building regulations, especially for rental or historic properties.
Ultimately, while professional services come at a higher initial cost, they often deliver better longevity and peace of mind.
Tips for Maintaining and Extending the Lifespan of Sash Cords
Regular inspection and early detection
Routine maintenance is key to preventing sudden failures. Regularly inspect the cords, pulleys, and weights for signs of fraying, corrosion, or misalignment. Annual checks, especially before winter or after heavy usage, help catch issues early. Also, listen for unusual noises during window operation and test the sash’s movement to ensure smoothness.
Choosing quality sash cords for durability
Invest in high-grade materials designed for longevity. Synthetic cords like nylon or polyester are more resistant to environmental damage than traditional natural fibers. Additionally, select cords with adequate load ratings relative to your window’s weight. Well-made pulleys and hardware also enhance lifespan, reducing the frequency of replacements.
Bulk purchasing or sourcing from reputable suppliers ensures consistent quality, and consulting with professional window specialists can guide you towards the best products for your specific needs.
Proper lubrication and handling during operation
Keeping pulleys and hardware well-lubricated minimizes friction and wear. Use appropriate lubricants, such as silicone spray or light machine oil, on moving parts periodically. Avoid excessive force during operation, and educate household members on gentle handling routines. Proper handling extends the functional life of both cords and hardware, reducing the likelihood of emergency replacements.
Additional Resources and Expert Advice
Video tutorials and detailed guides
Visual guides are invaluable for DIY enthusiasts. Popular platforms like YouTube host comprehensive tutorials from industry experts that walk through each step—from removal to installation. For example, the How To Replace Sash Cords video offers practical demonstrations that clarify complex procedures. Additionally, detailed PDF guides are available online, providing checklists, diagrams, and troubleshooting tips.
Professional sash cord repair specialists near you
If you prefer to outsource the task, professional services are readily accessible. Local sash window repair companies have the expertise and tools to perform durable replacements efficiently. You can find reputable providers by searching for “sash window repair near me” or visiting trusted online directories. Ensuring the technician’s experience and reviews can help you choose a reliable service provider.
{{!– Placeholder for inserting local contact details or links based on location –}}
Helpful FAQs about sash window maintenance and repairs
- Q: Can I replace sash cords myself?
- A: Yes, if you have the necessary skills and tools. Follow detailed guides and safety precautions.
- Q: How long does a sash cord last?
- A: Typically between 5 to 15 years, depending on material quality and usage frequency.
- Q: What are the costs involved in replacing sash cords?
- A: DIY repairs can cost as little as £10-£30 for materials. Professional replacements usually range from £70 to £150, depending on the number of windows and complexity.
- Q: Are sash cords suitable for historic or protected buildings?
- A: Yes, but it’s advisable to use period-appropriate or specialist-grade cords to maintain authenticity.
- Q: How can I prolong the lifespan of my sash cords?
- Regular inspections, high-quality materials, and proper operation help extend their durability.